【TIPS】お名前.com独自ドメインとXserver(WordPress)でホームページ作成手順まとめ
エンジニアライフスタイルブログを運営しているミウラ(@miumiu06171)です。
普段はフリーランスでシステムエンジニアをしております。
今回は、お名前.comで取得した独自ドメインとXserverのレンタルサーバーでホームページ(WordPress)を作成する手順ををまとめてみました。
個人のホームページに限らず、会社・ビジネス向けホームページを作成するときにも役立つので、お名前.comとXserverレンタルサーバーで構築したい方はぜひ参考にしてみてください。
Xserverのレンタルサーバーを契約
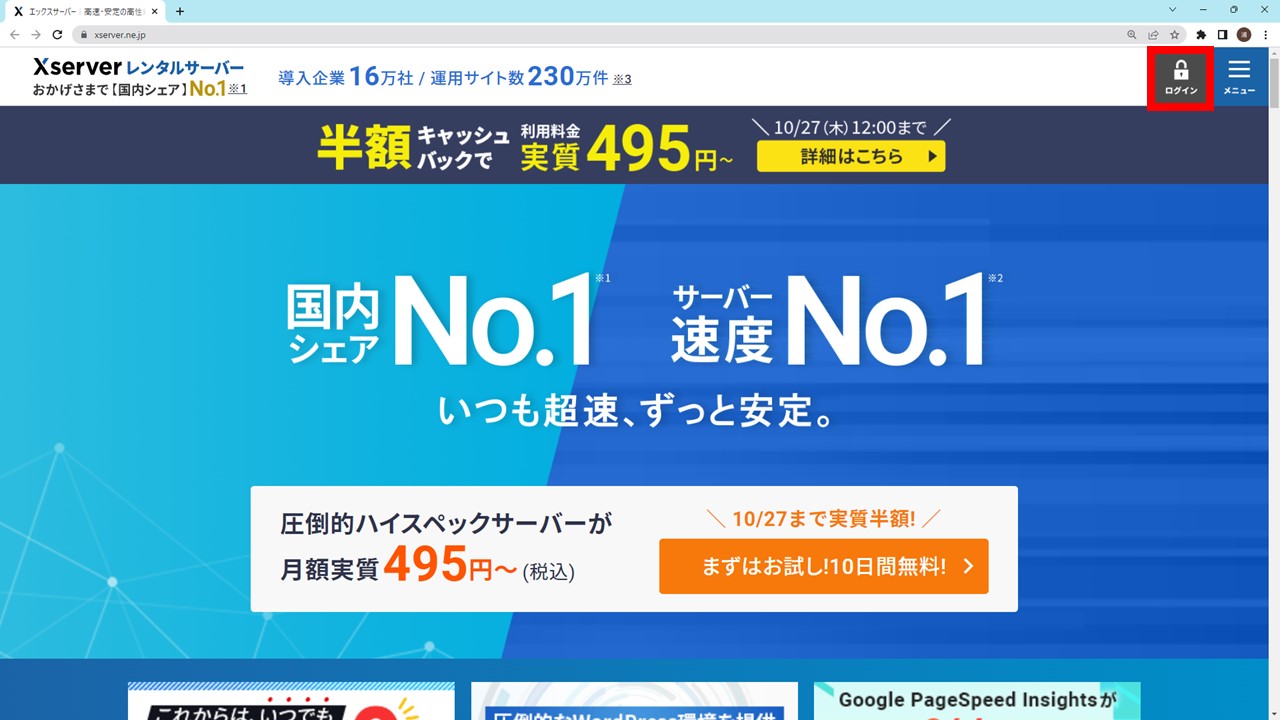
まずは、ホームページを外部公開するためにレンタルサーバーを契約する必要があります。
今回は、「Xserver(エックスサーバー)」のレンタルサーバーを契約します。
こちら![]() のXserverホームページにアクセスし、右上の「ログイン」アイコンをクリックします。
のXserverホームページにアクセスし、右上の「ログイン」アイコンをクリックします。
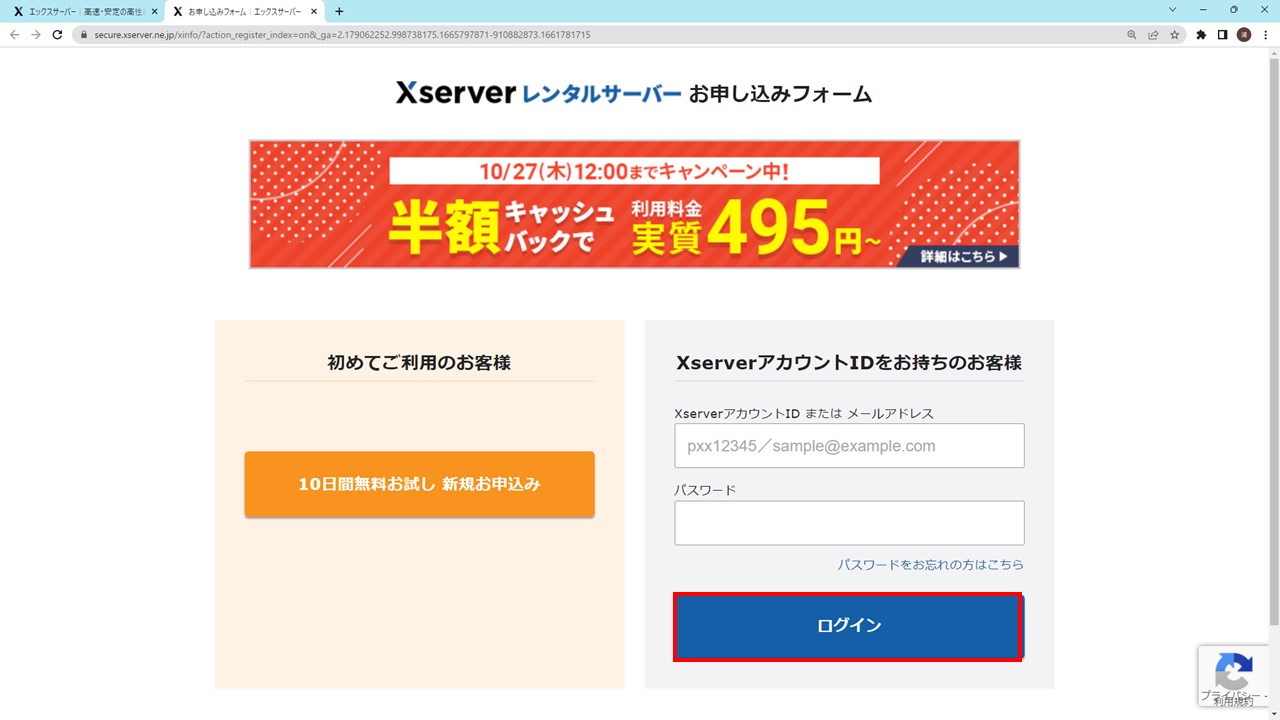
下図の画面になるので、Xserverを初めて利用する方は、左側の「初めてご利用のお客様」を選択し、アカウント作成と一緒に契約を開始します。
Xserverアカウントをすでに持っている場合は右の「ID、パスワード」を入力し、「ログイン」ボタンをクリックします。
次に下図の画面になるので、プランを選択、WordPressクリックスタートオプションはチェックを外したまま、利用規約にチェックし、「お申し込み内容を確認する」ボタンをクリックします。

Xserverの契約内容を確認し、「申し込む」ボタンをクリックします。
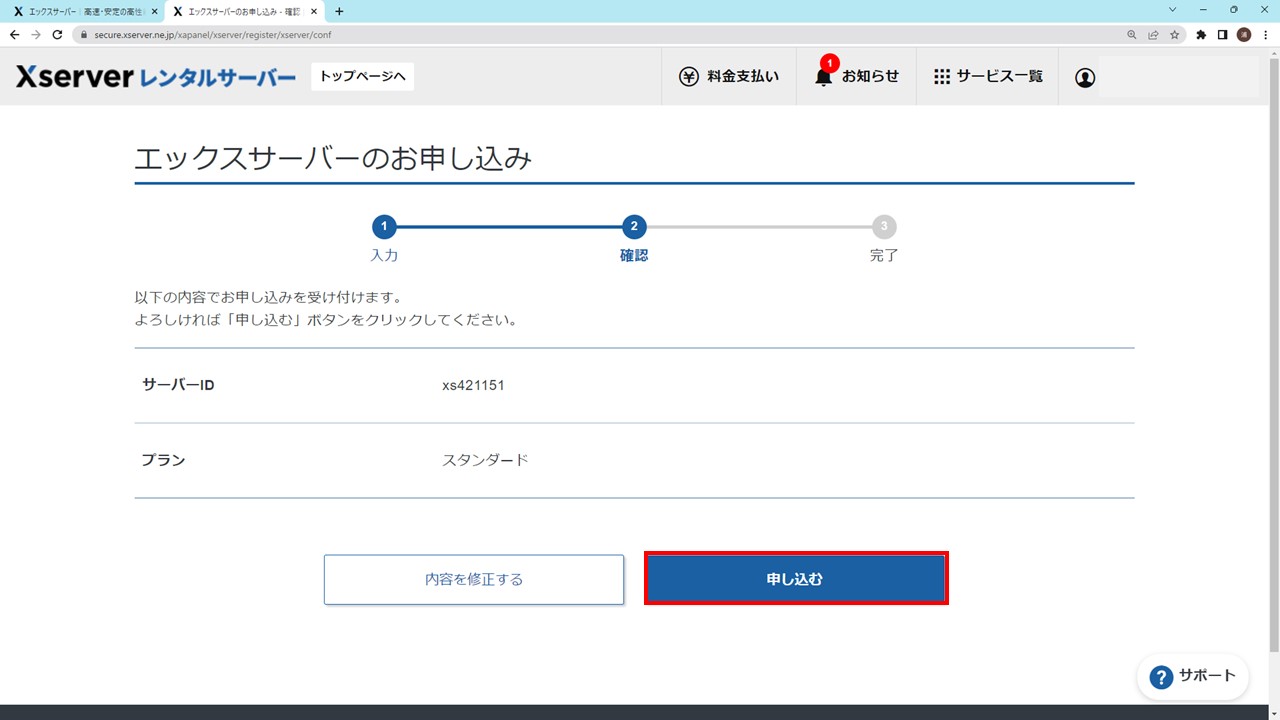
これでXserverのレンタルサーバーの申し込みは完了です。
Xserverのレンタルサーバー情報を確認
申し込みが完了したら、Xserverのレンタルサーバーのサーバー情報としてIPアドレスとネームサーバーを確認していきます。
Xserverのサーバー情報(IPアドレス)を確認
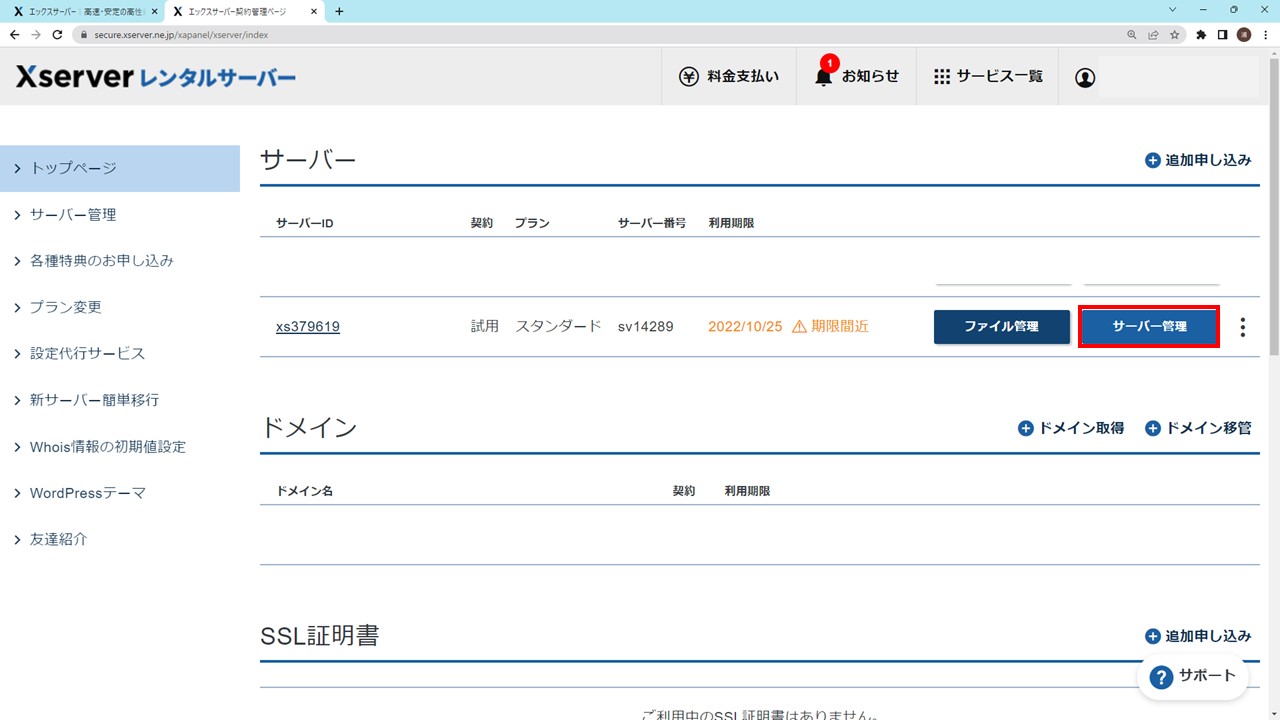
申し込みが完了すると同時に下図のような画面になるので、「サーバー管理」をクリックします。
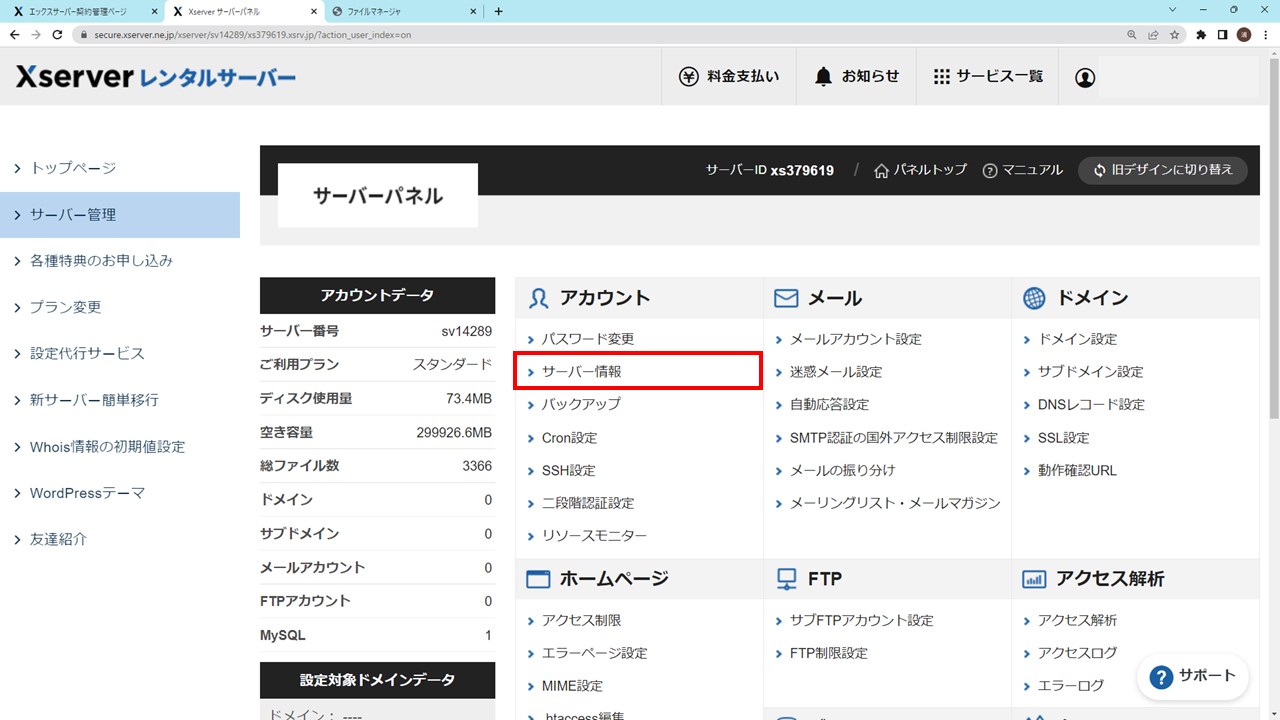
「アカウント」→「サーバー情報」をクリックします。
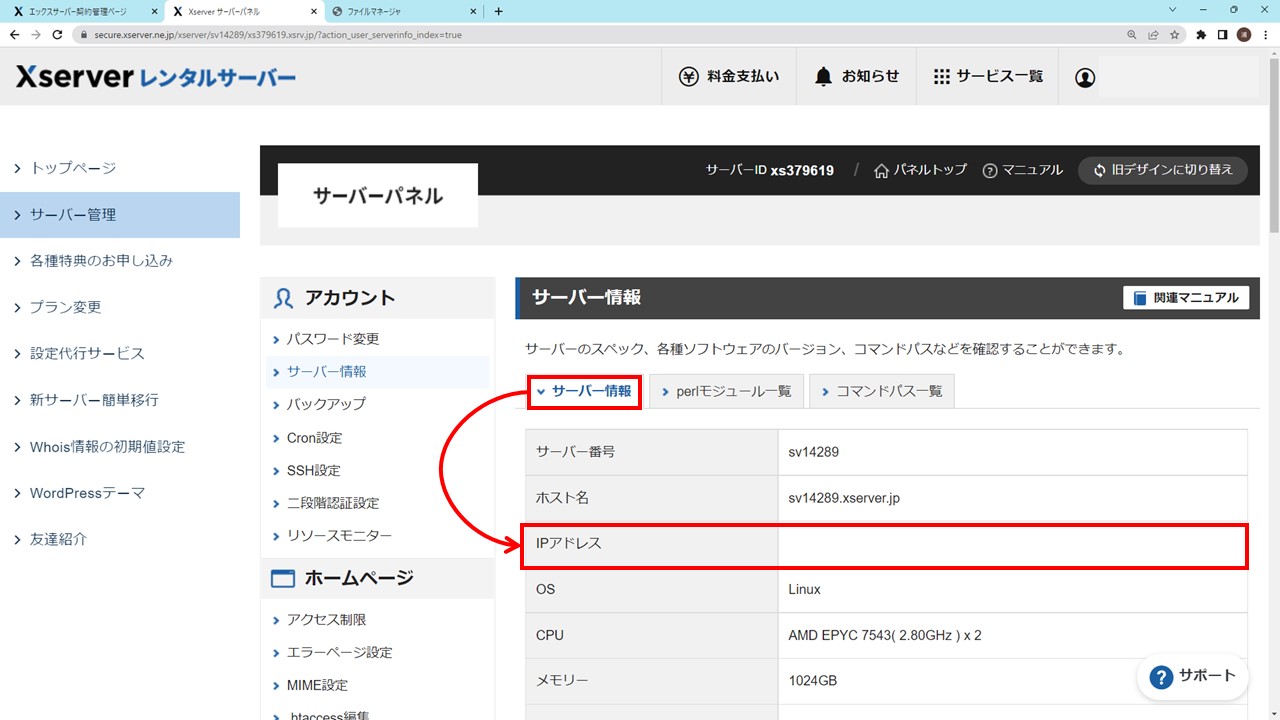
「サーバー情報」タブ→「IPアドレス」欄に記載される「●●●.●●●.●●●.●●●」の値を控えておいてください。
のちほどDNS設定するときに値を使用します。
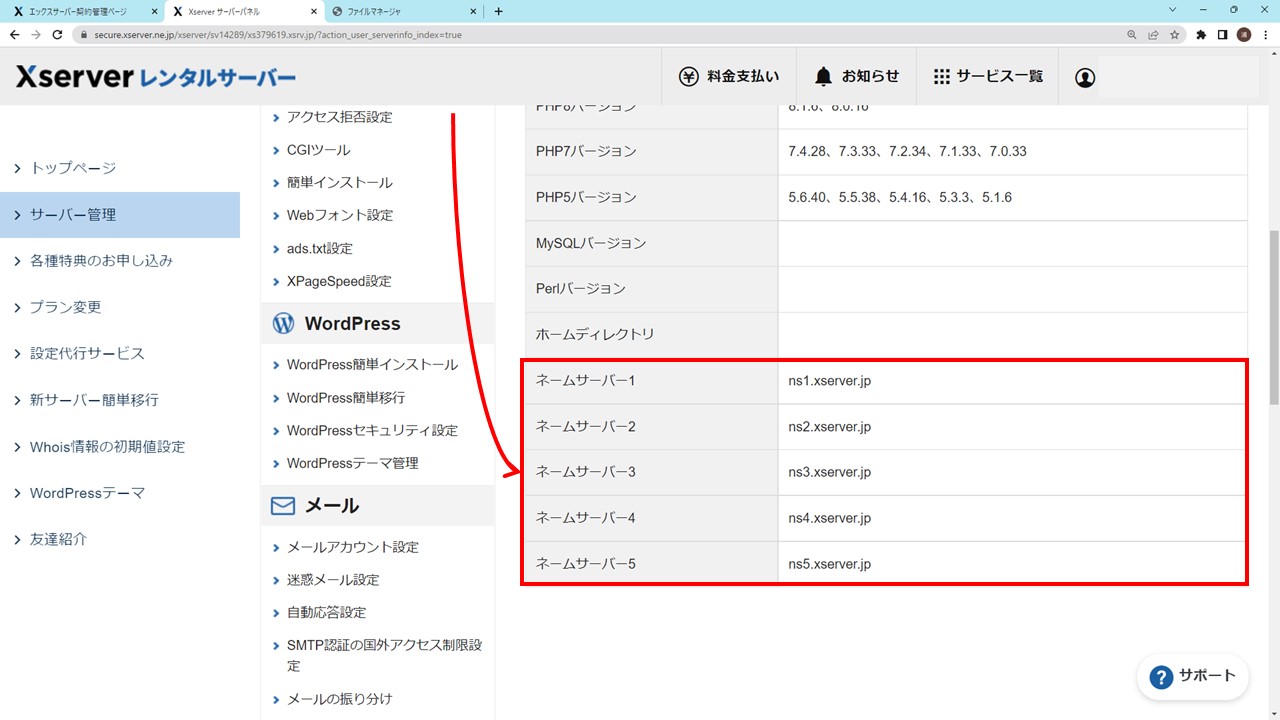
Xserverのサーバー情報(ネームサーバー)を確認
ネームサーバーの情報は、同じ「サーバー情報」タブ→「ネームサーバー1」~「ネームサーバー5」欄に記載される5つの文字列です。
こちらものちほどお名前.comのネームサーバー設定追加で文字列を使います。
お名前.comでネームサーバー設定追加
次は、先程確認したXserverのネームサーバーの文字列を、お名前.comで追加していきます。
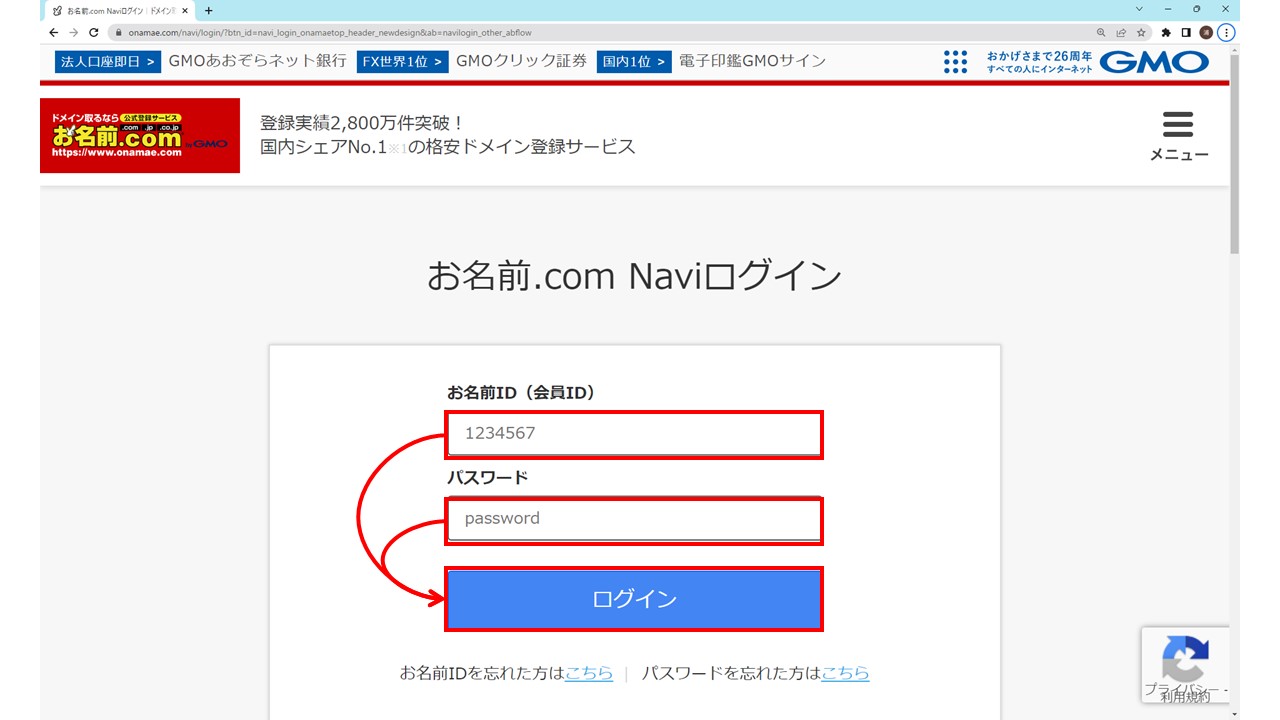
まずは、お名前.comにアクセスし、ログインします。
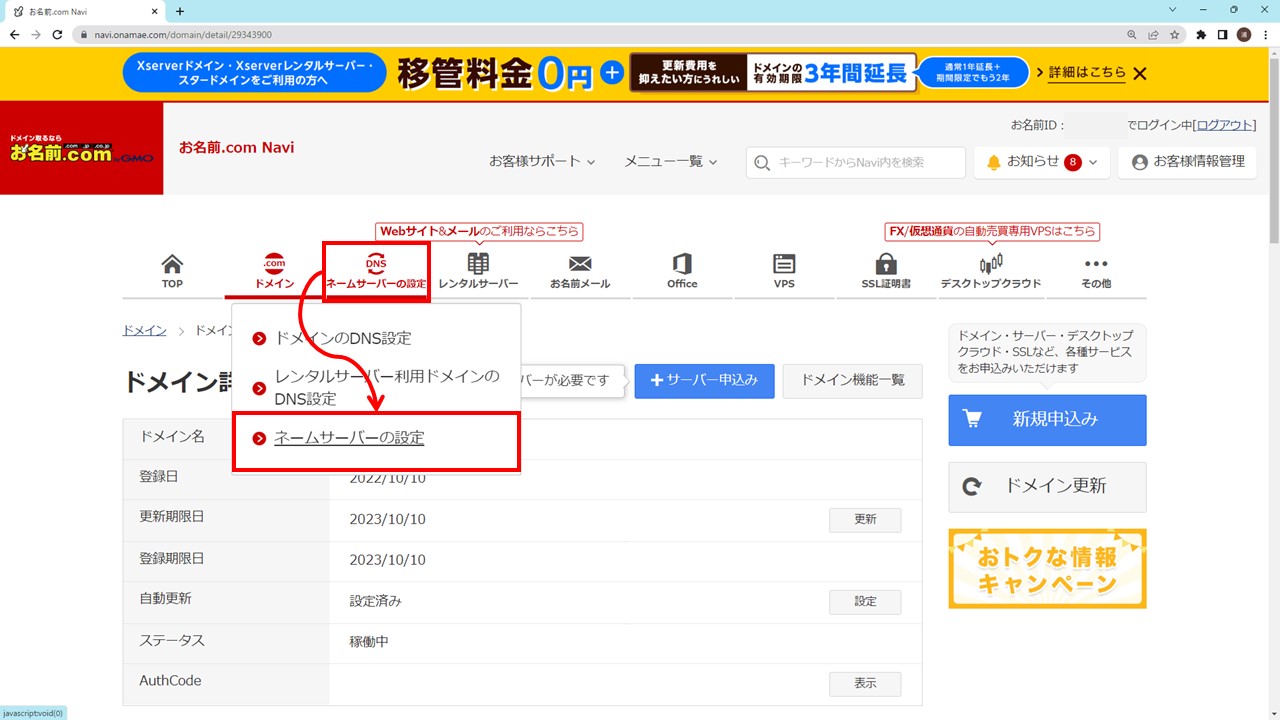
下図のような画面になるので、該当するドメイン名のリンクをクリックします。

次に「ネームサーバーの設定」→「ネームサーバーの設定」をクリックします。
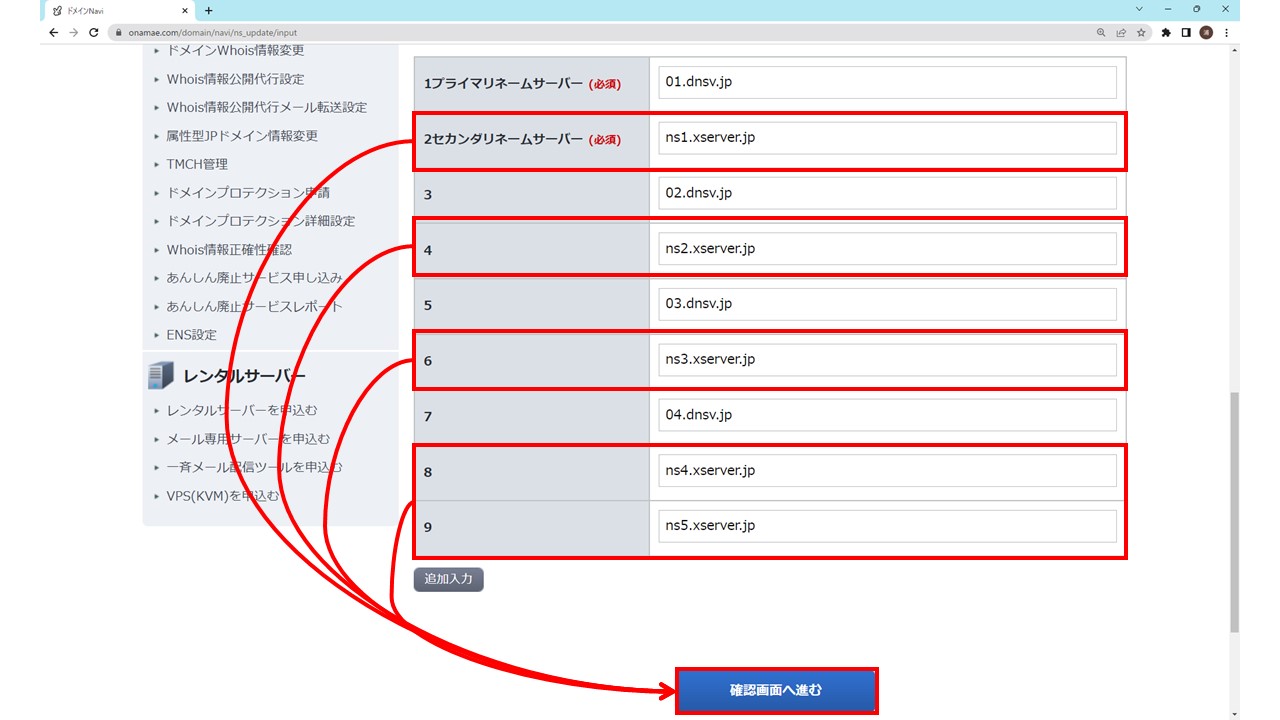
該当するドメイン名にチェックを入れ、「他のネームサーバーを利用」タブをクリックします。
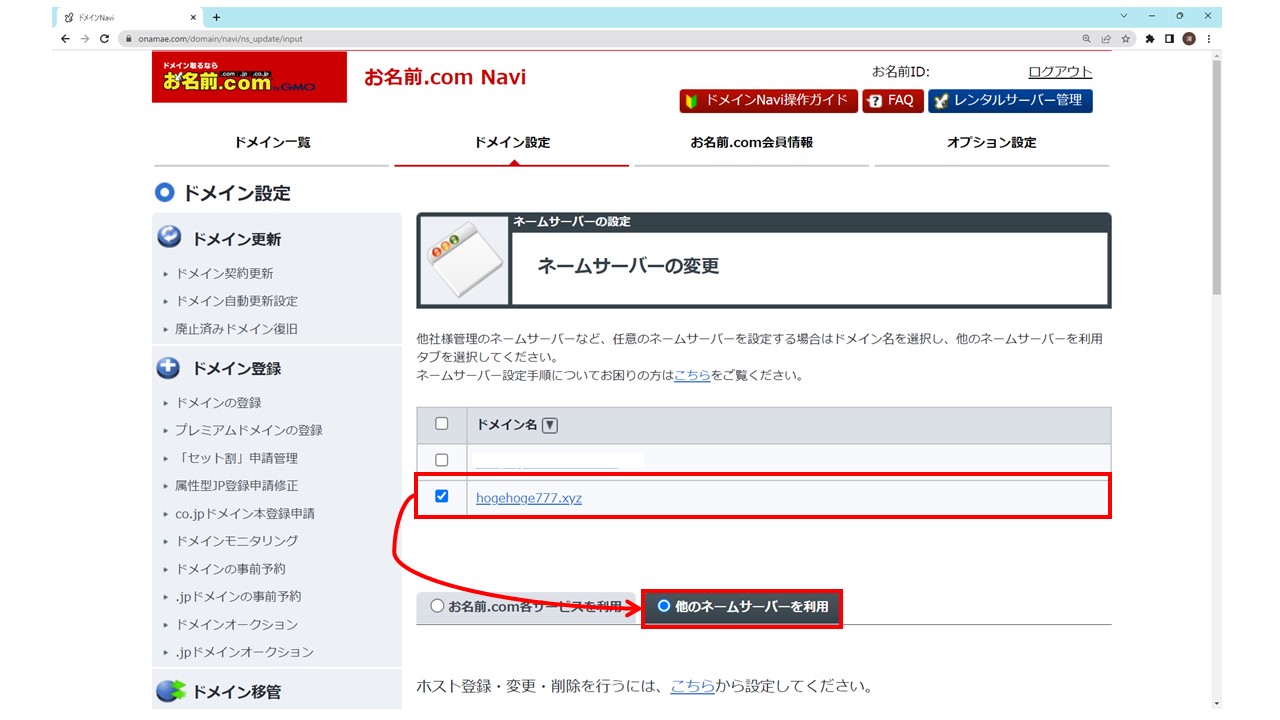
下図のような画面になるので、ネームサーバー情報に現在設定されているネームサーバーが表示されています。

ここで下図のようにXserverのネームサーバー(ns1.xserver.jp ~ ns5.xserver.jp)を追加します。
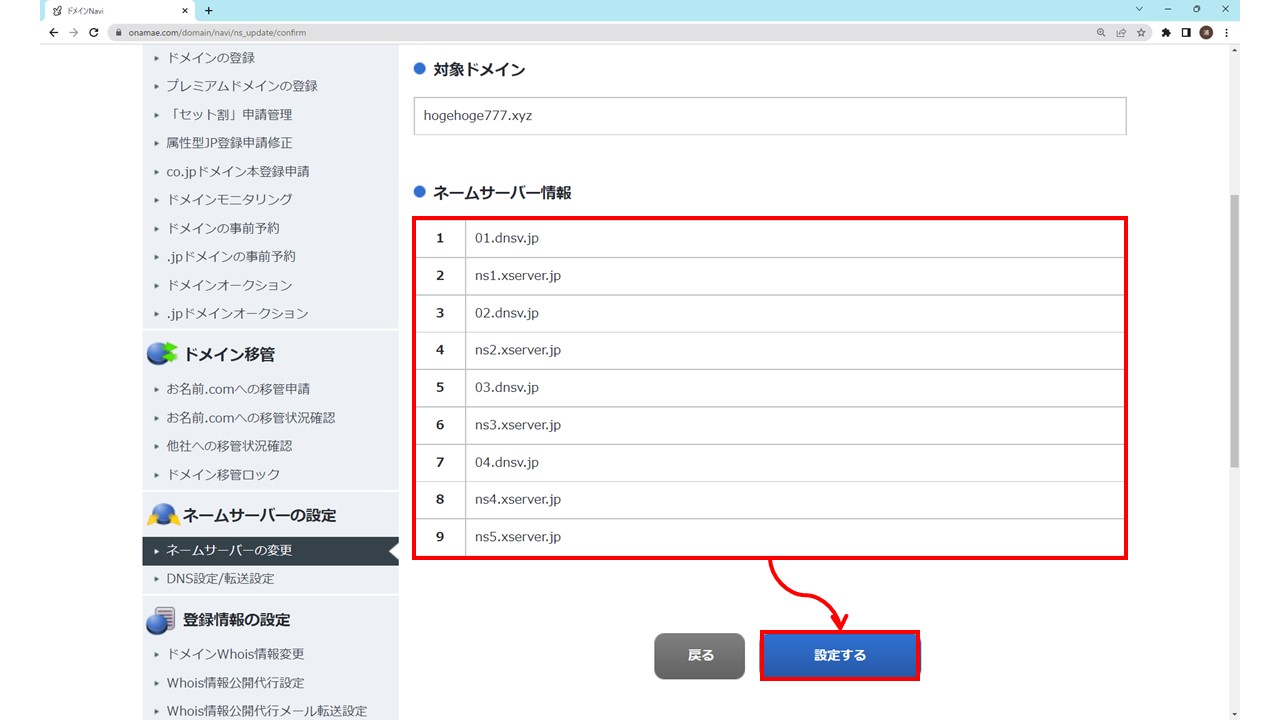
ネームサーバーの変更内容を確認し、「設定する」ボタンをクリックします。
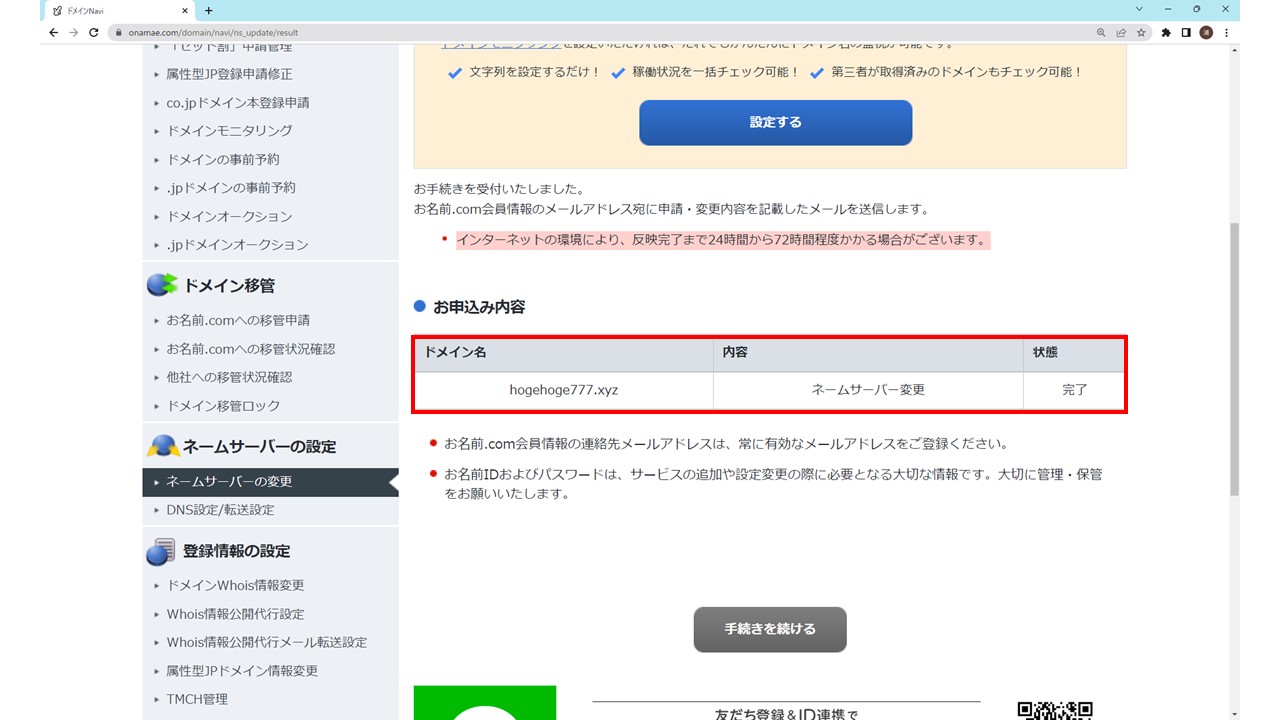
下図のようにネームサーバー設定が完了状態になっていたらオッケーです。
お名前.comでDNS設定を追加(Aレコード追加)
次は、お名前.com内でDNSレコードを追加していきます。
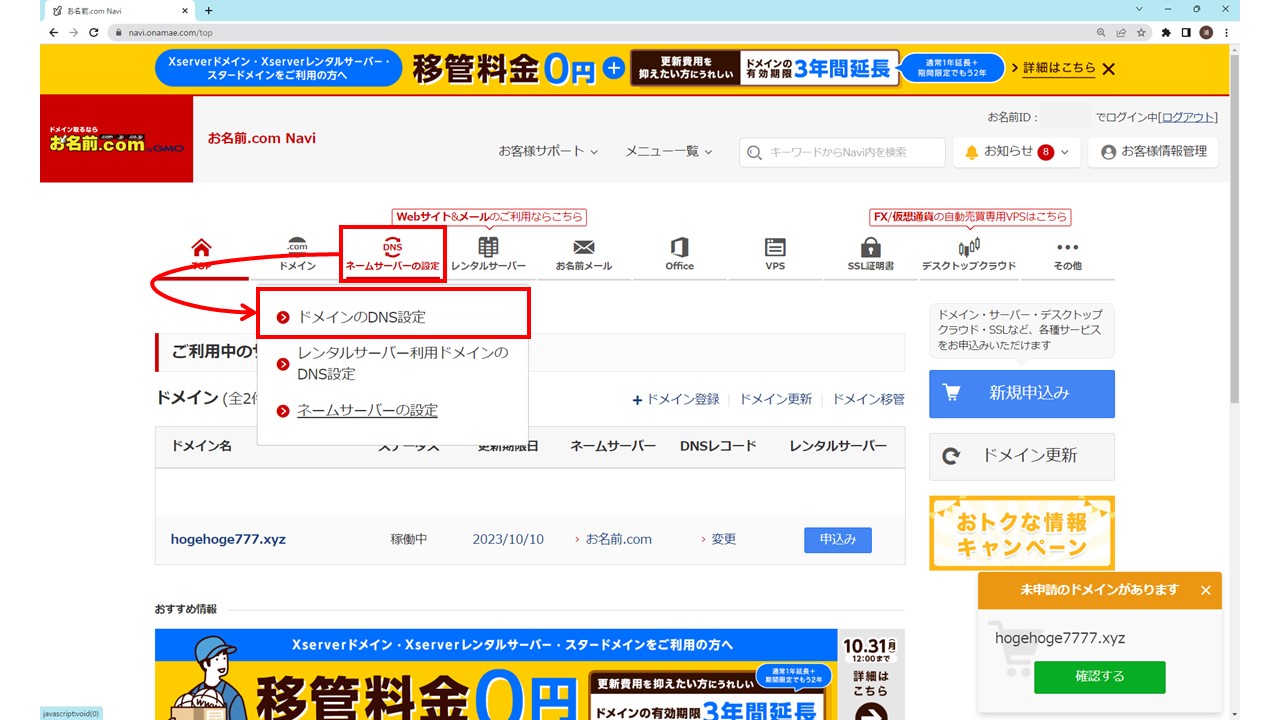
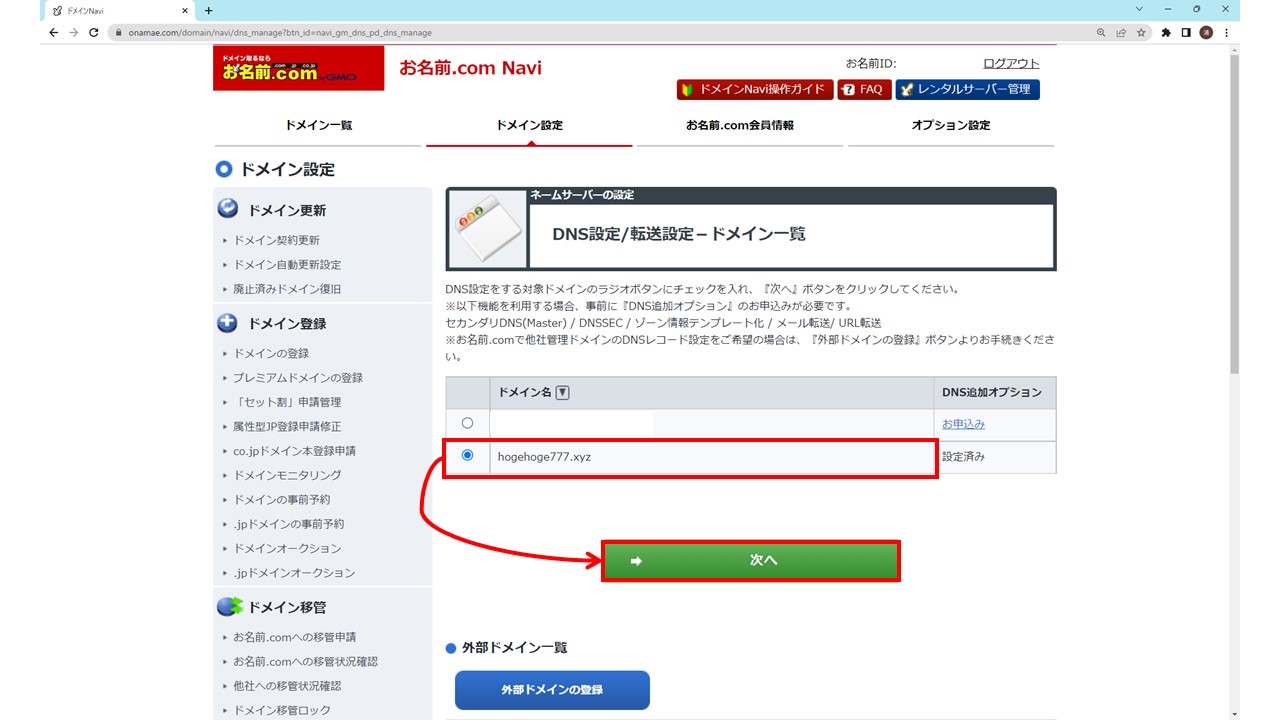
前章と同様にお名前.comにログインした後、「ネームサーバーの設定」→「ドメインのDNS設定」をクリックします。
該当するドメイン名にチェックを入れ、「次へ」ボタンをクリックします。
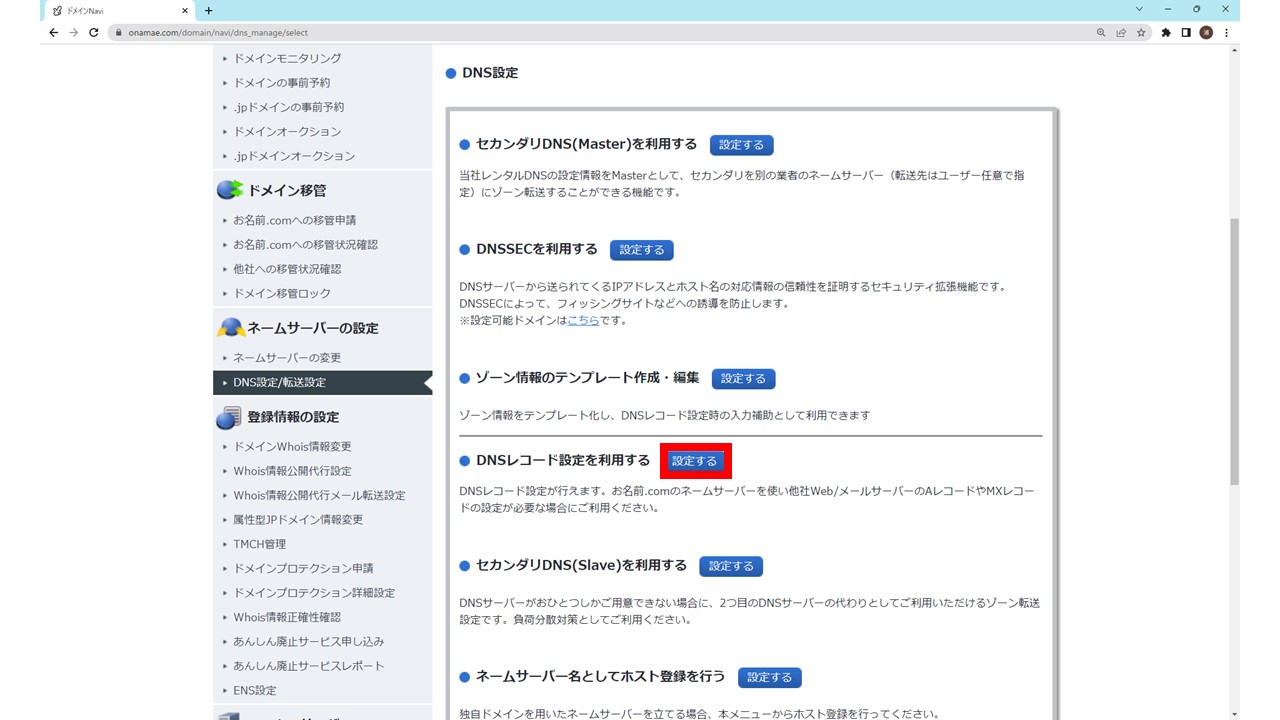
DNS設定の中の「DNSレコード設定を利用する」項目の「設定する」ボタンをクリックします。
下図のような画面になるので、ホスト名、TYPE、TTL、VALUE(IPアドレス)を入力し、「追加」ボタンをクリックします。
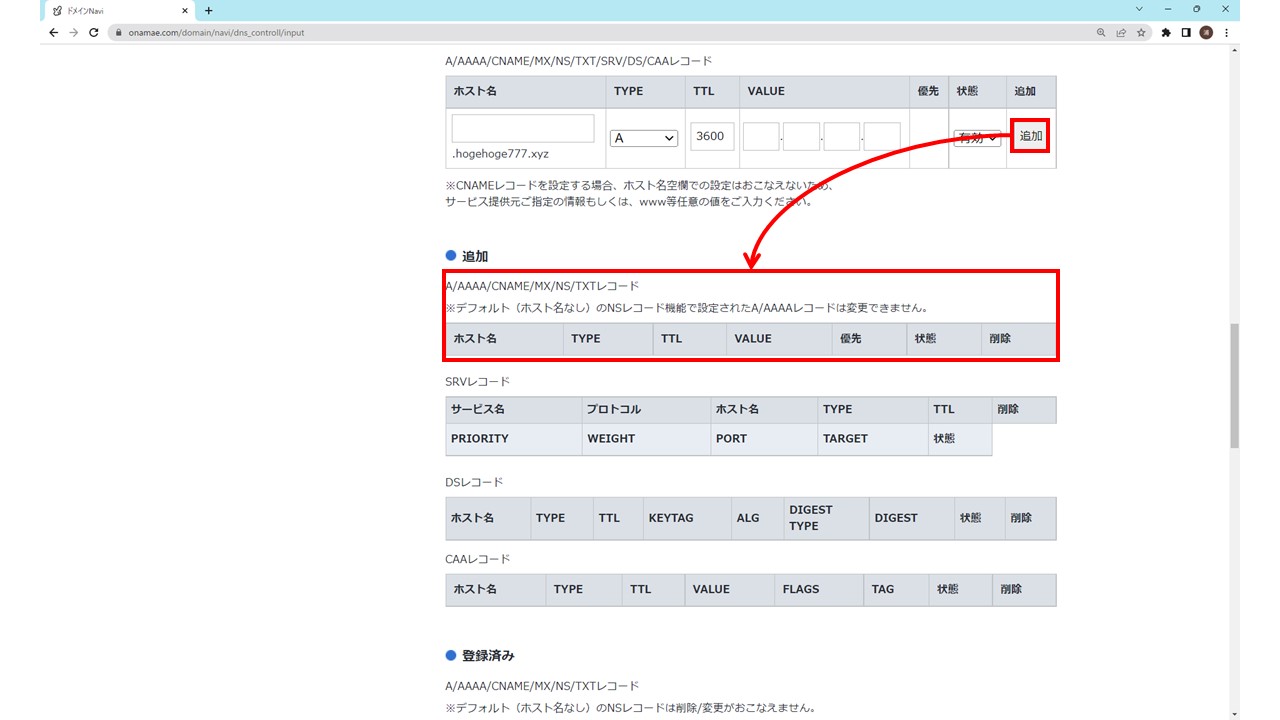
下図のように以下の2つのAレコードを追加してください。

ホスト名:@.<ドメイン名>
TYPE:A
TTL:3600
VALUE: XserverのレンタルサーバーのIPアドレス

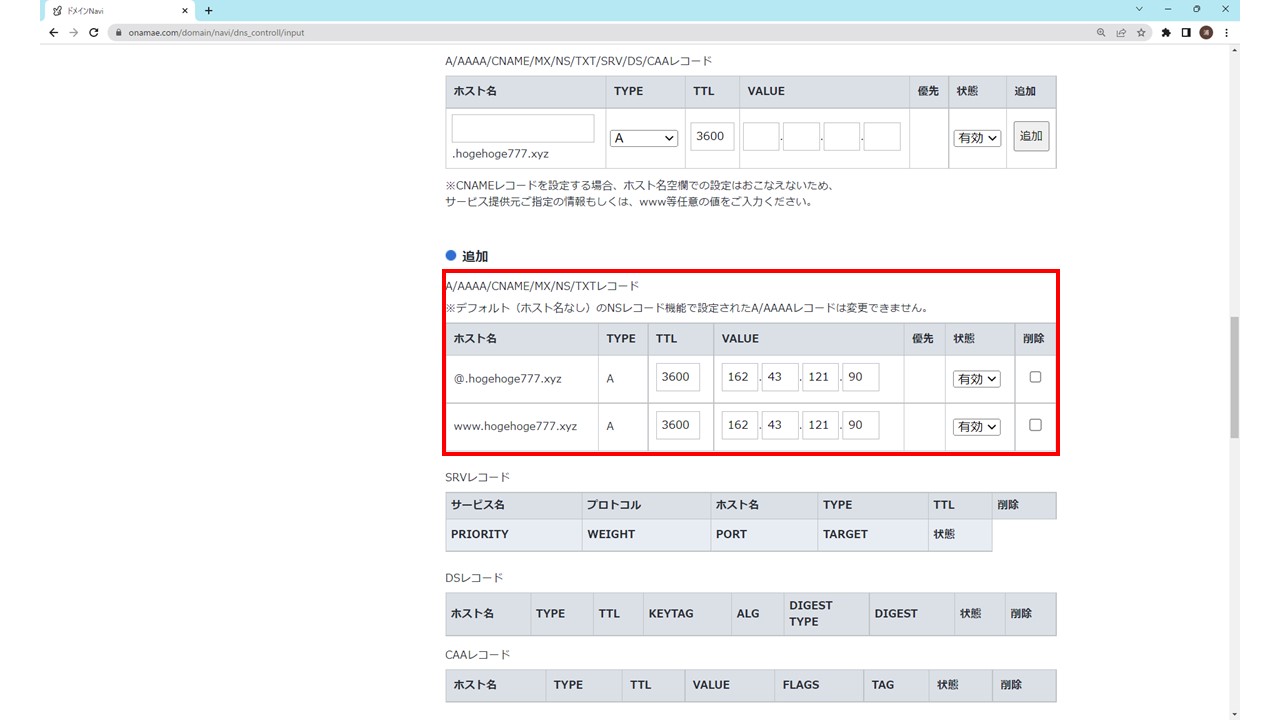
ホスト名:www.<ドメイン名>
TYPE:A
TTL:3600
VALUE: XserverのレンタルサーバーのIPアドレス
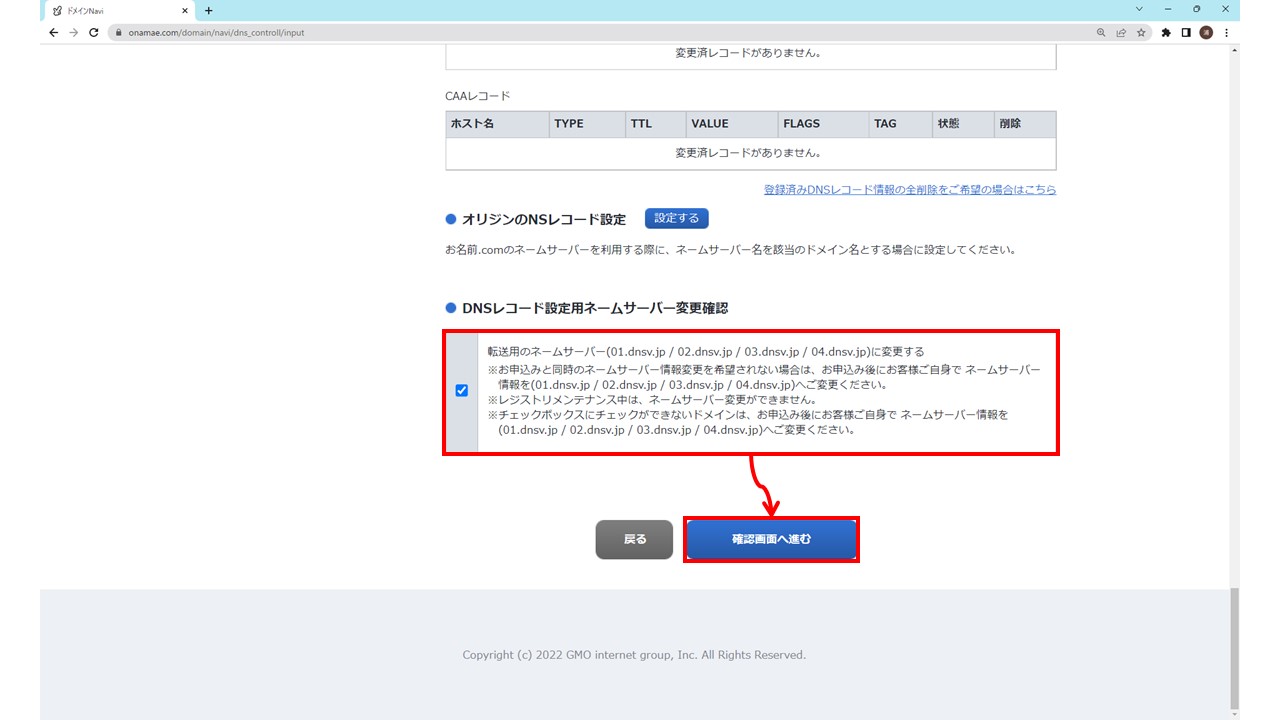
Aレコードを2つ追加できたら、画面を下にスクロールして下図の赤枠の部分にチェックを入れ、「確認画面に進む」ボタンをクリックします。
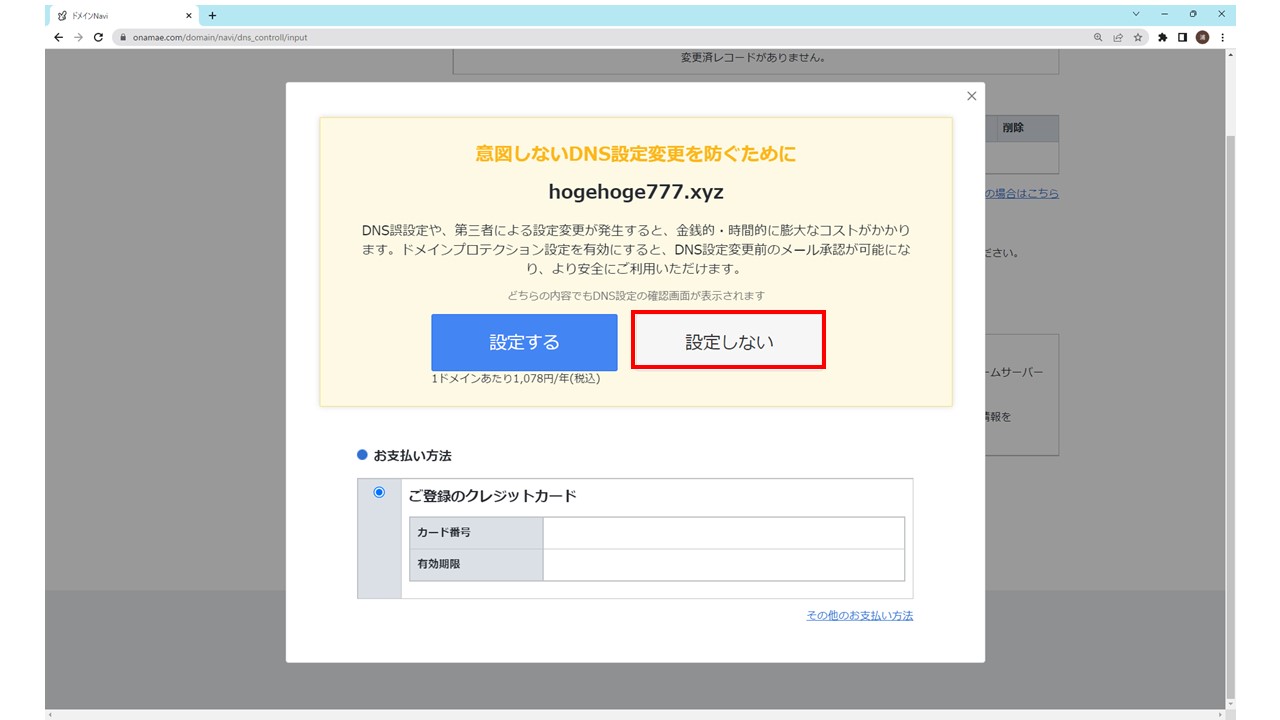
下図の画面が表示された場合は、「設定しない」ボタンをクリックします。
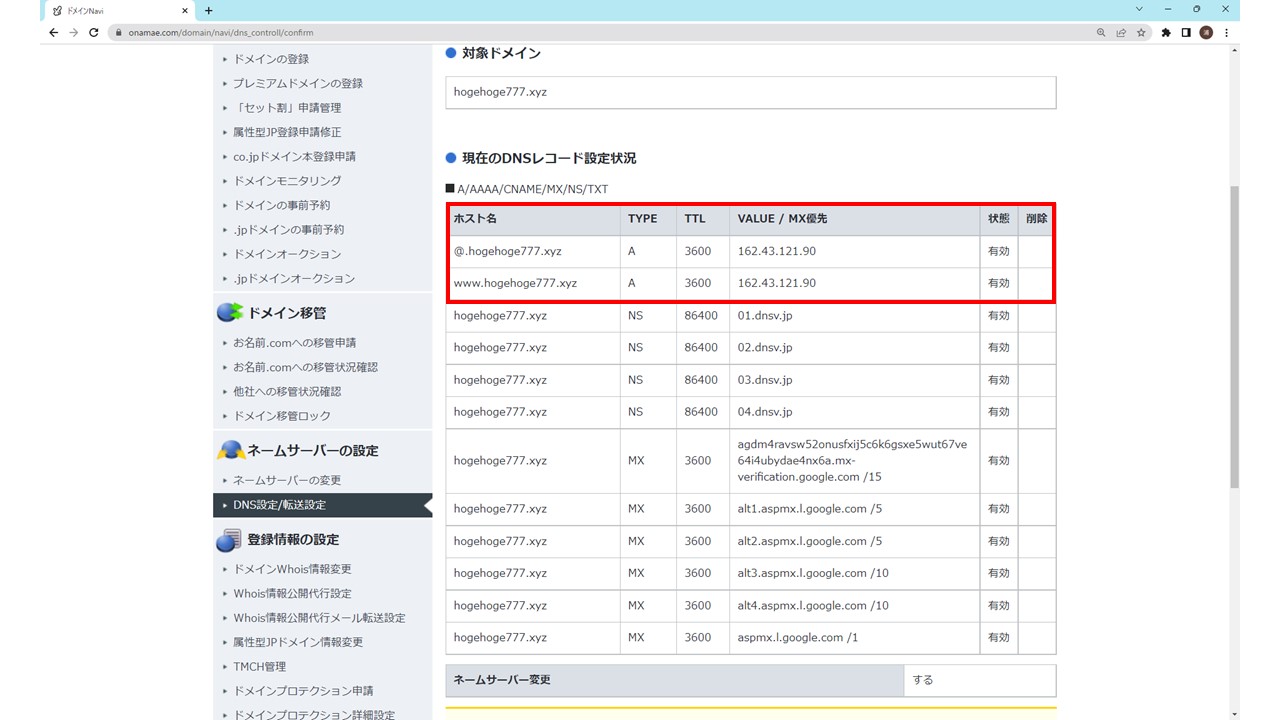
さきほど追加した2つのAレコードが表示されていることを確認し、次へ進みます。
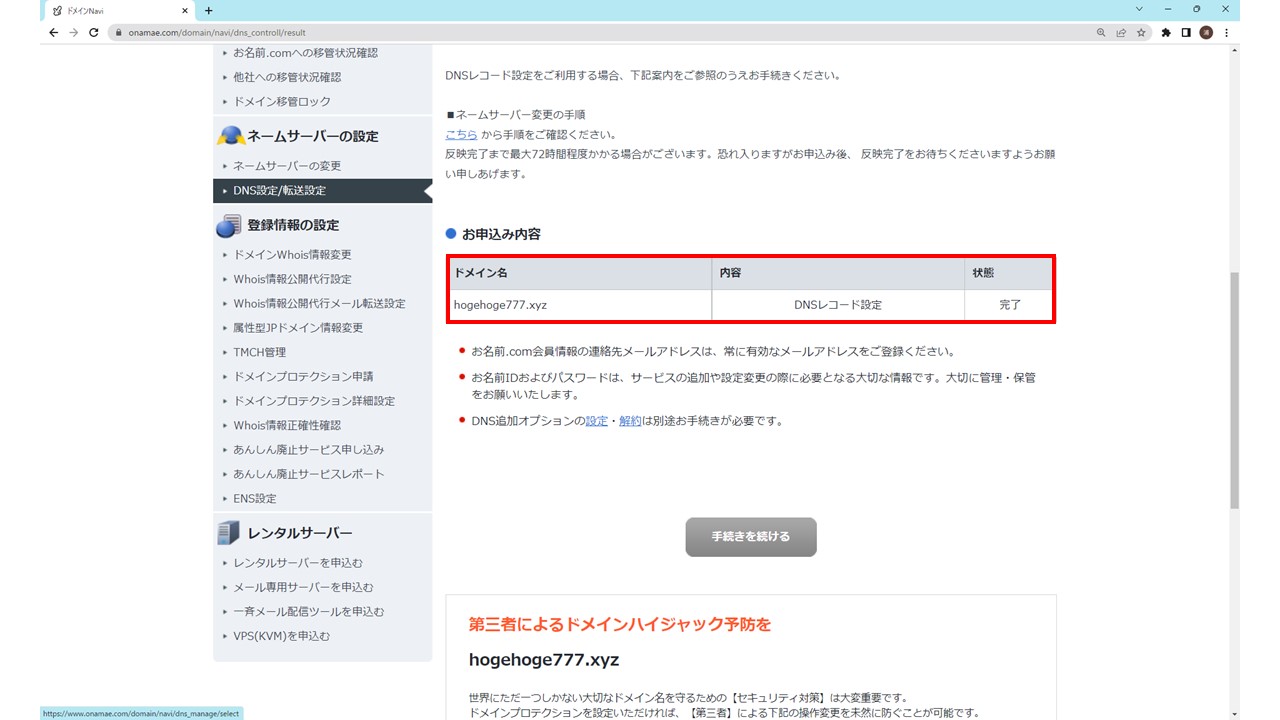
下図のようにDNSレコード設定が完了状態になったら、オッケーです。
Xserverのドメイン設定
次は、Xserver上でお名前.comで取得したドメイン名の設定を行います。
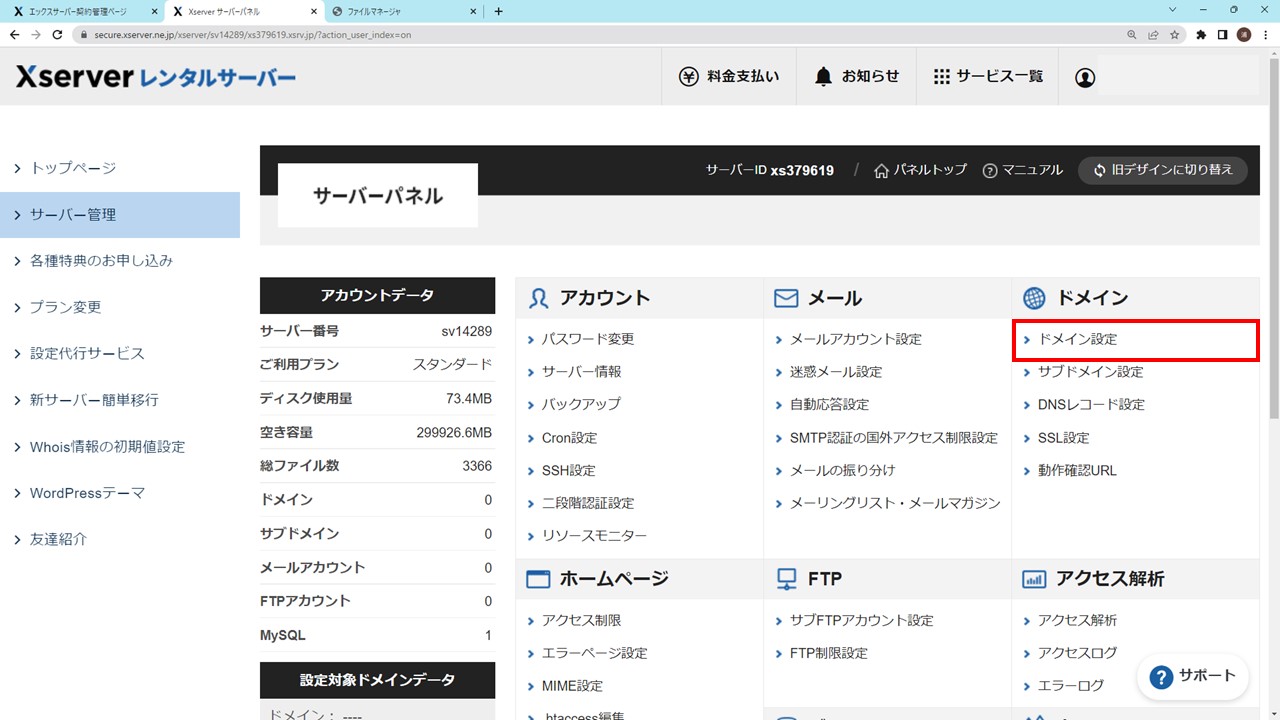
Xserverのサーバー管理画面に入り、下図のように「ドメイン」→「ドメイン設定」をクリックします。
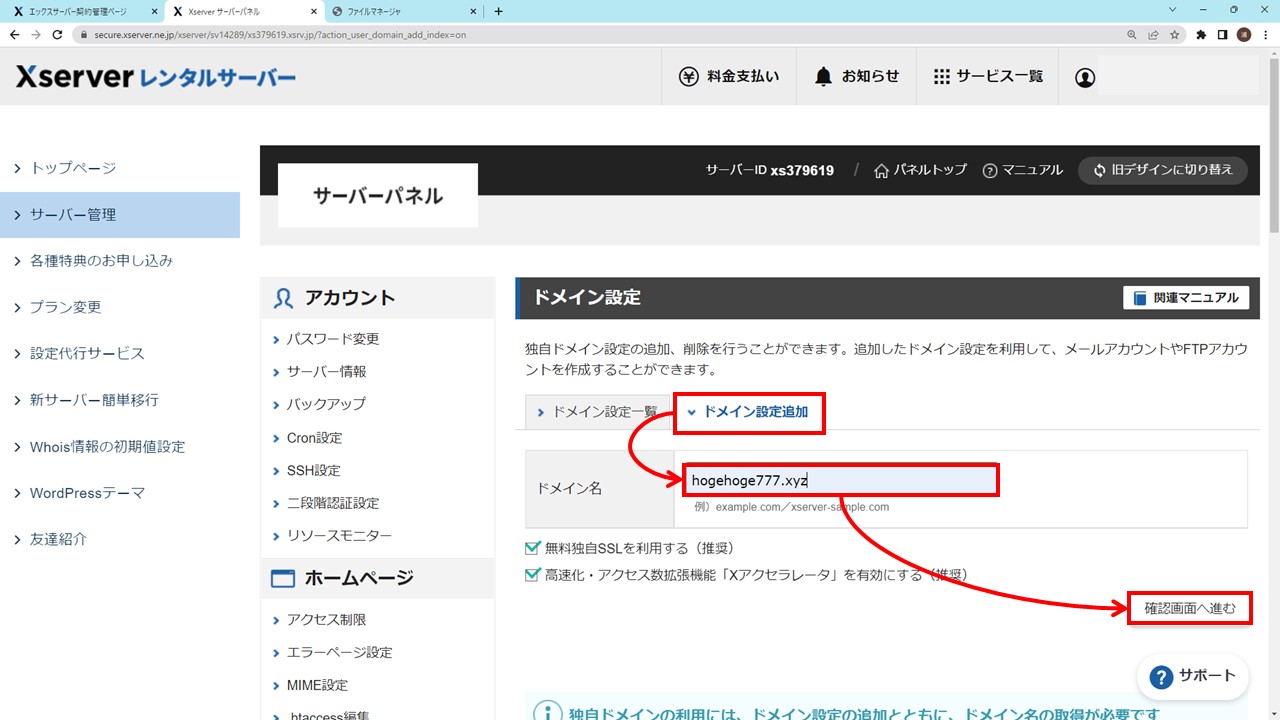
「ドメイン設定追加」タブで該当ドメイン名を選択し、「確認画面に進む」ボタンをクリックします。
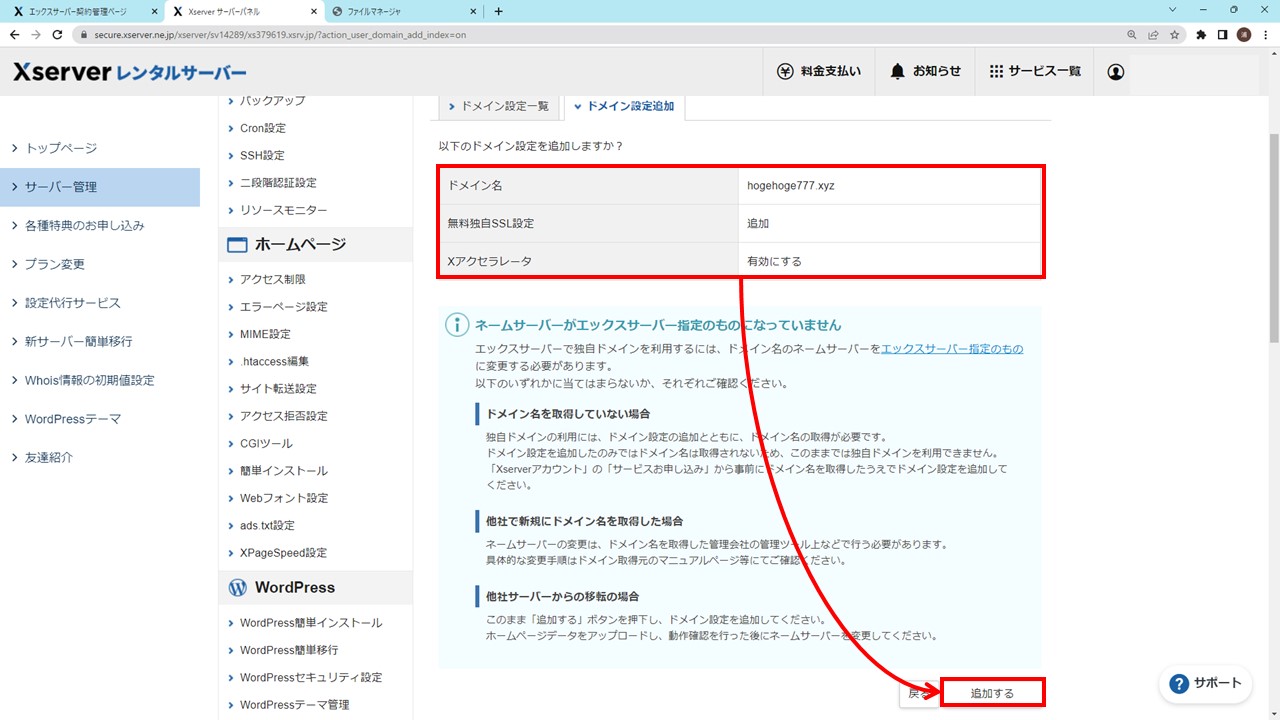
下図の赤枠の内容で間違いないか確認し、「追加する」ボタンをクリックします。
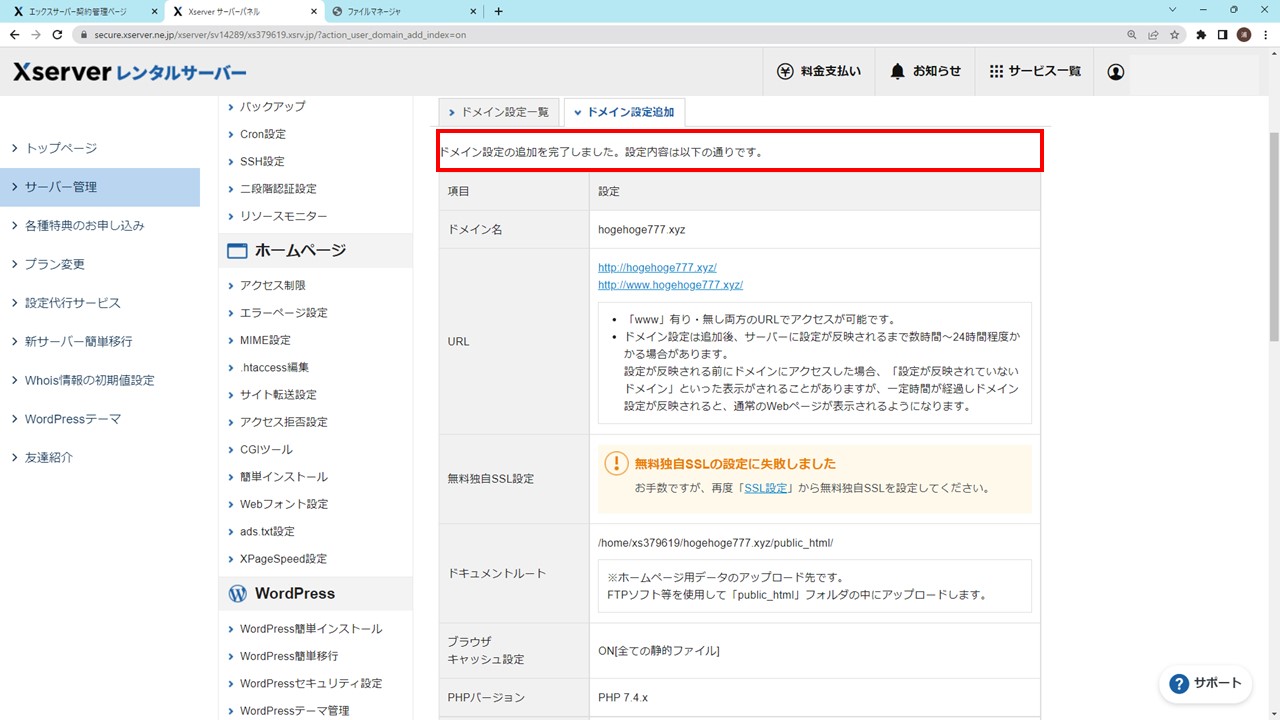
下図のようにドメイン設定の追加が完了したメッセージが表示されたら、オッケーです。
下図のように「ドメイン設定一覧」タブで該当ドメイン名を確認すると、「反映待ち」となっていると思います。
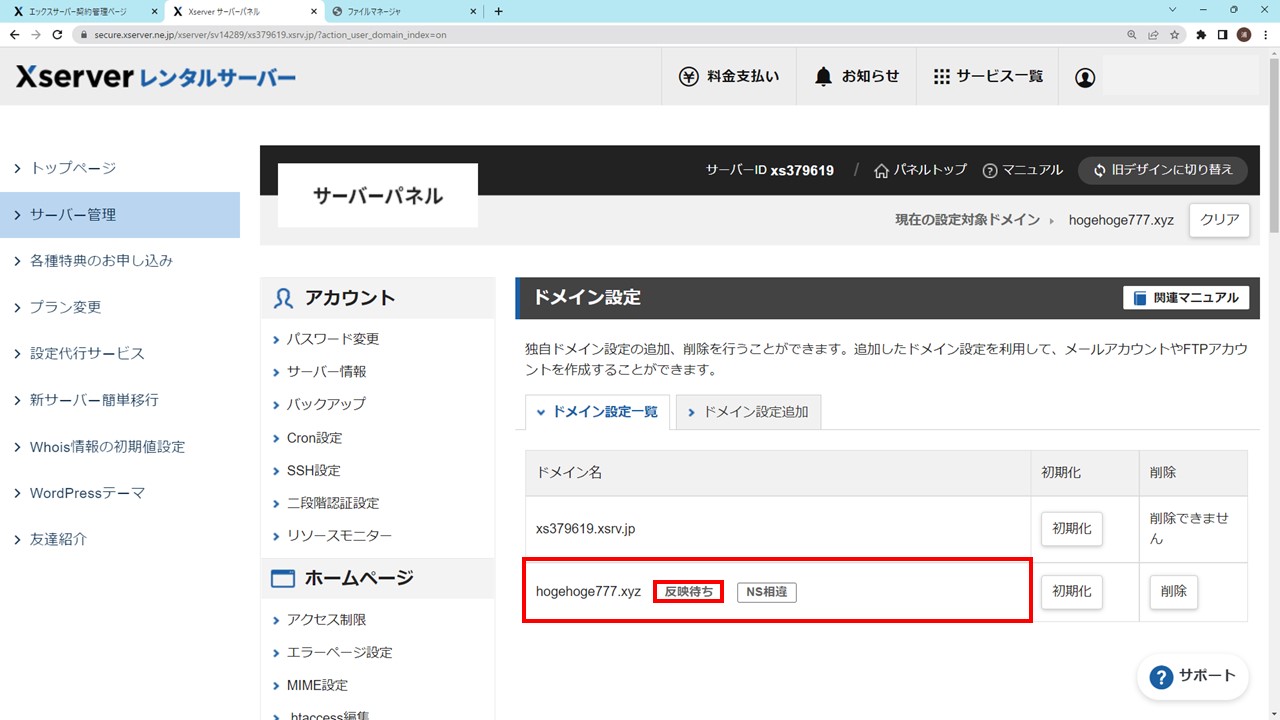
「反映待ち」が消えるまで、1時間~24時間ほどしばらく待ちましょう。
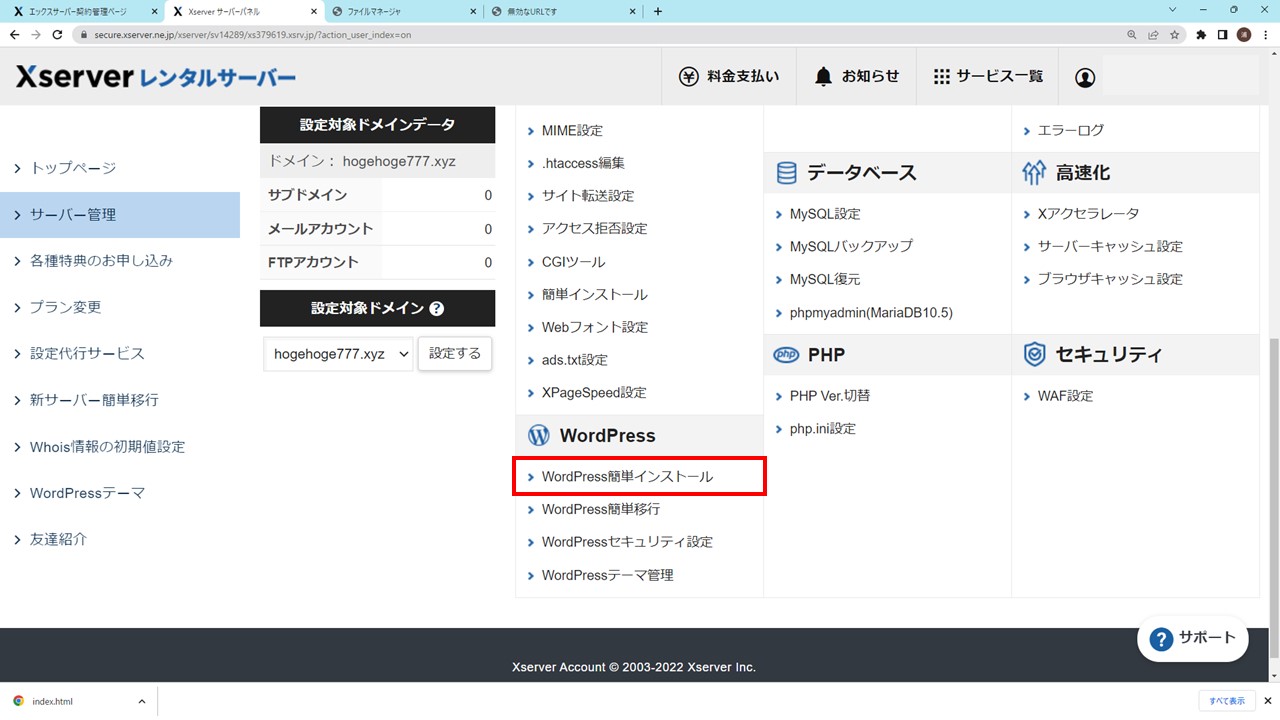
WordPress簡単インストール
ドメイン設定が終わったら、WordPressをインストールしていきましょう。
Xserverのサーバー管理画面に入り、下図のように「WordPress」→「WordPress簡単インストール」をクリックします。
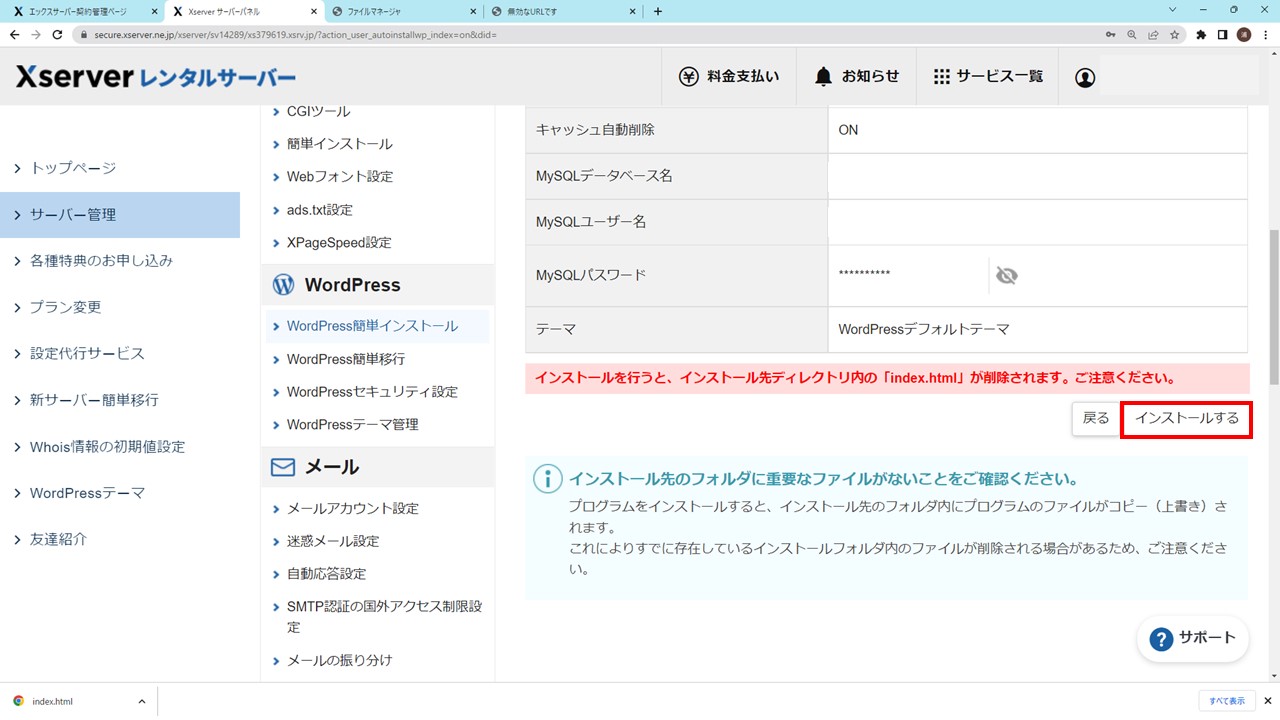
「WordPressインストール」タブで、下図のように必要事項を記入してください。
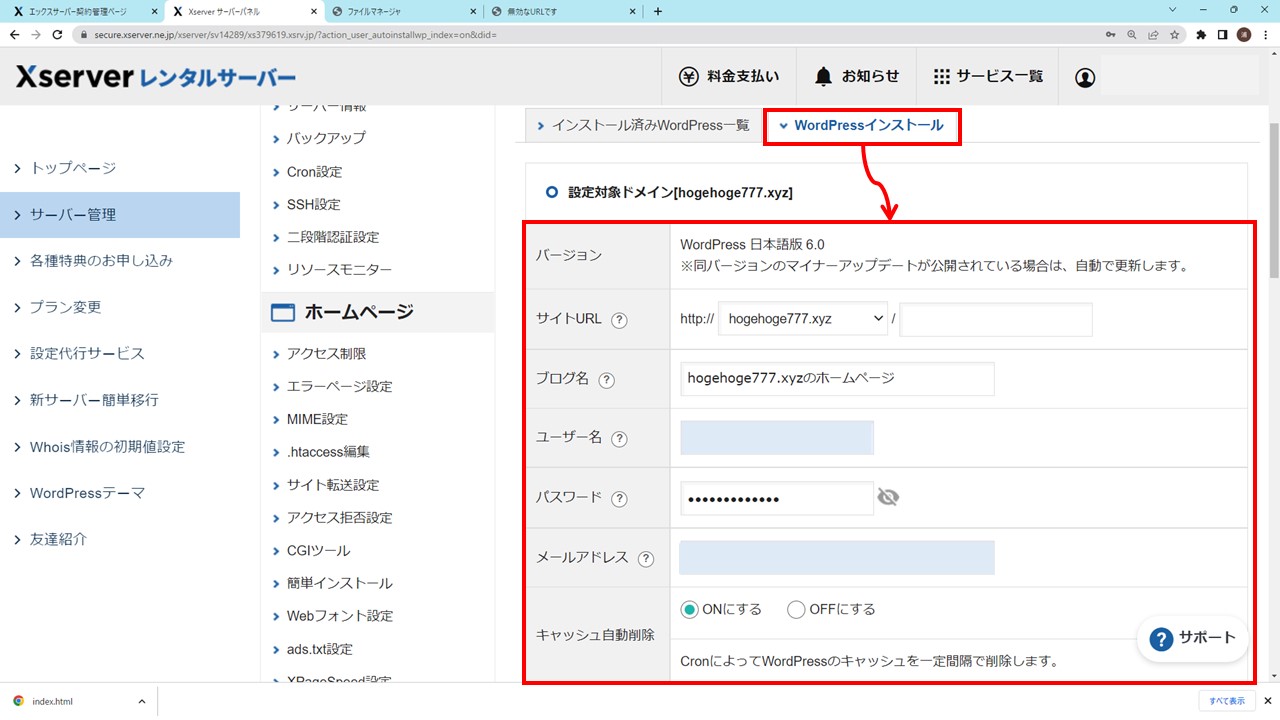
ブログ名、ユーザー名、パスワード、メールアドレスを入力すれば、あとはデフォルト設定のままで大丈夫です。
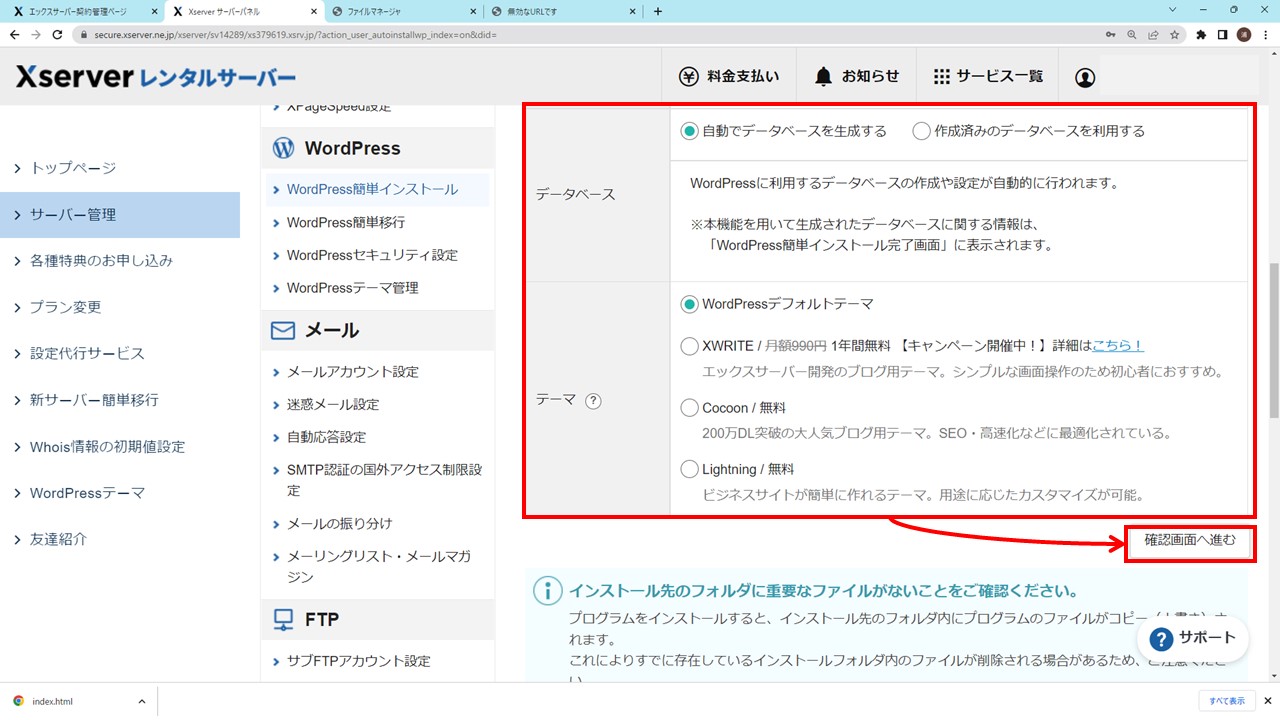
「確認画面に進む」ボタンをクリックし、下図のような確認画面の内容を確認しましょう。

間違い等なければ、「インストールする」ボタンをクリックします。
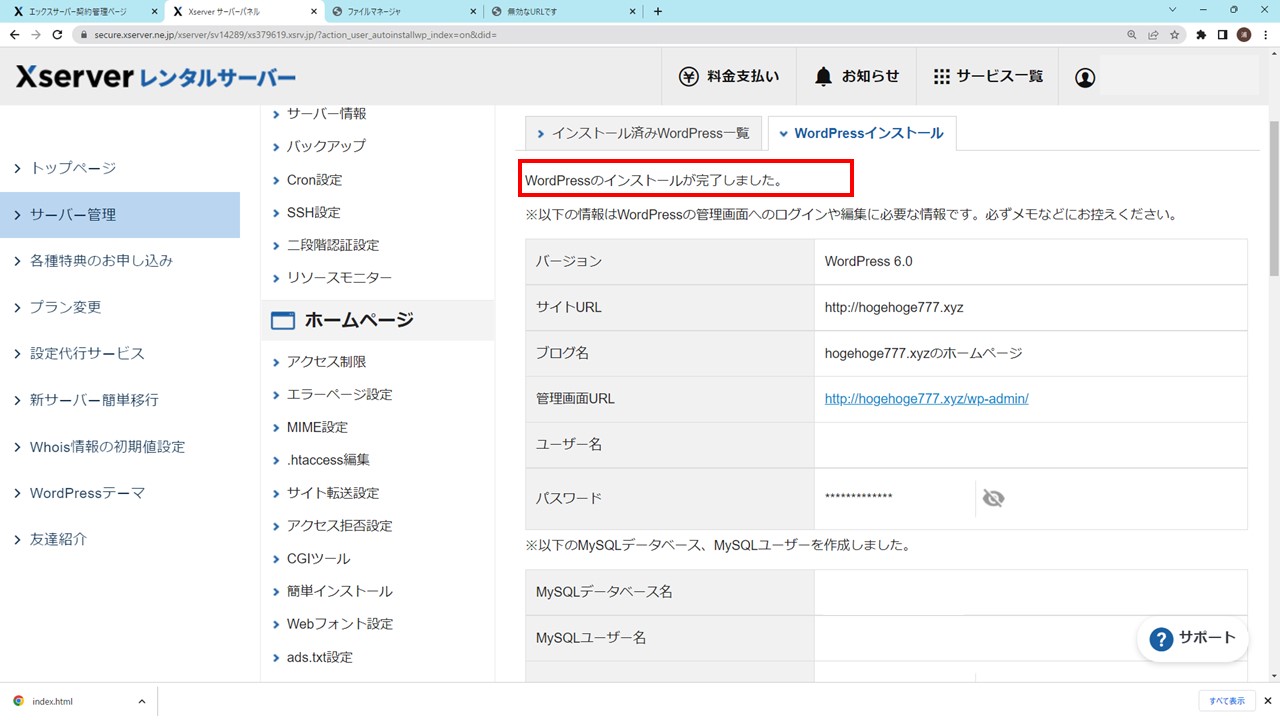
下図のようにWordPressのインストール完了のメッセージがでていたら、オッケーです。
WordPress Webサイト動作確認(httpアクセス編)
Google Chrome等のWebブラウザで「http://<ドメイン名>」にアクセスすると、下図のようにWordPressのサイトが表示されれば、httpアクセスまで確認できたことになります。
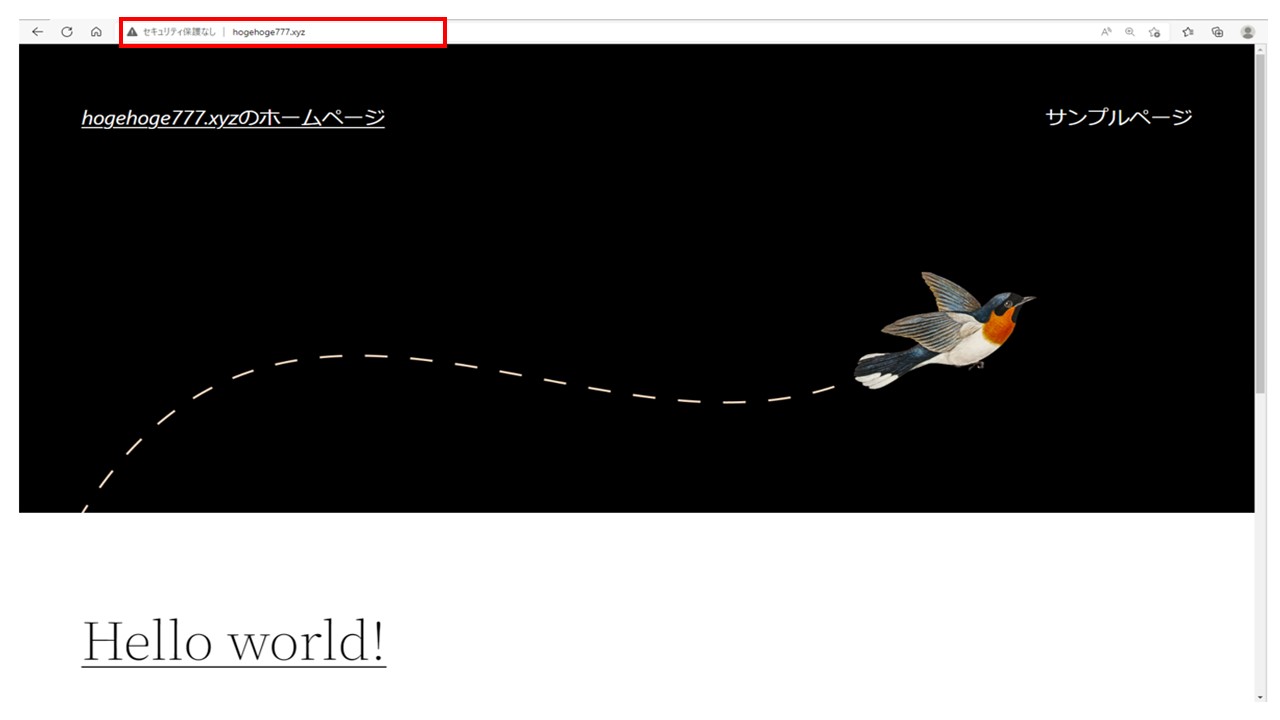
WordPressのテーマは、WordPress簡単インストールでデフォルトテーマをインストールしましたが、その他のテーマや有料テーマをインストールすれば簡単に会社ホームページを作成できます。
まとめ
いかがでしたでしょうか。
お名前.comで取得した独自ドメインとXserverのレンタルサーバーでホームページを作成する手順をまとめてみました。
お名前.comとXserverの組み合わせでサーバーをたてるときは、ぜひ本記事を参考にして頂ければと思います。
【関連記事】
【TIPS】お名前.com独自ドメインのメールアドレスをGmailで扱う手順(Google Workspace連携編)